A DIY Guide to Flawless Renovations: Tackling Door Frames, Shutter Boxes, and More
A successful home renovation is all in the details. While a fresh coat of paint or new wallpaper can transform a room’s main surfaces, it’s the handling of tricky features—like old door frames, roller shutter boxes, and hidden wall imperfections—that truly separates an amateur job from a professional-grade finish. These are the areas that can frustrate even the most enthusiastic DIYer, leading to messy results or problems that surface months later.
This comprehensive guide will walk you through conquering these common renovation challenges. We’ll provide step-by-step instructions for renewing dated door frames, flawlessly wallpapering around roller shutter boxes, and preventing unsightly rust stains from ruining your hard work. Get ready to elevate your next project from “good enough” to absolutely stunning.
Pre-Project Prep: Tackling Hidden Problems
Before you even think about applying your final finishes, a thorough preparation phase is crucial for addressing underlying issues that could compromise your results. One of the most common—and often overlooked—problems is the presence of metal elements within your walls.
Preventing Future Blemishes: How to Handle Metal Fixtures
Have you ever seen an otherwise perfect wall marred by a mysterious brown or orange stain that seems to appear out of nowhere? The culprit is almost always rust bleeding through from a metal object in the wall. When you apply water-based wallpaper paste or paint, the moisture activates oxidation on any embedded metal, such as old nails, screw heads, or metal corner beads. Over time, this rust works its way through the wallpaper or paint, creating a permanent stain.
Fortunately, there’s a simple and highly effective preventative measure.
The Aluminum Foil Solution
To permanently block rust from showing through your new wallpaper, you can create a physical barrier using a small piece of household aluminum foil.
- Identify the Metal: Carefully inspect your walls for any metal parts. This could be a nail that’s too deep to remove, a screw head that has been plastered over, or even metal brackets.
- Create the Barrier: Cut a piece of aluminum foil slightly larger than the metal object.
- Apply and Secure: Press the foil firmly over the metal part, ensuring it lies completely flat against the wall. The wallpaper paste you apply later will be sufficient to hold it in place.
- Wallpaper as Usual: Proceed with wallpapering directly over the foil. The thin foil will be completely invisible under the paper, but it will form an impenetrable barrier, preventing moisture from reaching the metal and stopping any potential rust in its tracks.
This quick and easy trick ensures your walls remain pristine for years to come.
Mastering the Art of Wallpapering Tricky Features
Wallpapering a large, flat wall is straightforward. The real test of skill comes when you encounter obstacles like windows, doors, and especially roller shutter boxes. These features require precision and a methodical approach to achieve a seamless, professional look.
A Seamless Finish Around Roller Shutter Boxes
The roller shutter box (Rolladenkasten) is a common feature in many homes, and it often presents a wallpapering puzzle. Simply trying to wallpaper over it or cut around it while the cover is attached will result in messy edges and an unprofessional finish. The correct method involves temporarily disassembling the box.
Step 1: Open and Prepare the Box
Before you begin wallpapering the surrounding wall, carefully open the roller shutter box. This usually involves removing a few screws or nails holding the front cover plate in place.
Opening the box serves two purposes:
- Cleaning: It allows you to clean out any dust, debris, or insects that may have accumulated inside.
- Insulation Check: This is the perfect opportunity to check and improve the box’s insulation. A poorly insulated box can be a significant source of drafts and heat loss. If there’s enough space, you can fit a precisely cut sheet of Styrofoam or rigid foam insulation inside, securing it flush with the opening.
Step 2: Wallpaper the Components Separately
For a truly clean finish, you must treat the cover plate and the box itself as two separate surfaces.
- Wallpaper the Cover Plate: Remove the cover plate completely and wallpaper it on a flat surface. Once the wallpaper is applied, use a pencil or the tip of your scissors to gently poke through the paper from the back to mark the screw holes.
- Wallpaper the Box Frame: Now, wallpaper the main wall, continuing the paper right over the shutter box frame and the opening (or the new insulation you installed). Let the paper dry completely.
Step 3: Reassembly and Finishing Touches
Once the wallpaper on both the wall and the cover plate is fully dry, it’s time to reassemble.
- Upgrade Your Screws: When reattaching the cover, take the opportunity to replace old, rusty, or flat-head screws with modern, short cross-head screws. They are much easier to remove in the future, even if they get painted over.
- Align and Attach: Carefully align the cover plate with the box. Because you pre-marked the screw holes on the wallpapered cover, you can easily drive the screws through the paper and into their original positions.
- Conceal the Screws: To make the finish perfect, you have two options. You can either dab a small amount of white paint on the screw heads to help them blend in, or you can cut a tiny patch from a wallpaper scrap and carefully glue it over each screw head for a nearly invisible finish.
- Seal for Drafts: If you still feel a slight draft around the edges of the reinstalled cover, run a thin, neat bead of paintable acrylic sealant around the joints. This will eliminate drafts and create a clean, final edge.
Upgrading Your Room’s Architecture: Beyond the Walls
While renovating, you may notice that even with perfect walls, old, damaged, or dated door frames can detract from the overall look. Replacing door frames is a messy, labor-intensive job. However, there’s an innovative and cost-effective solution that can completely transform them: using laminate flooring.
A Modern Facelift: Renewing Old Door Frames with Laminate
This unconventional approach uses the durability and aesthetic variety of modern laminate flooring to create a sleek, hard-wearing new surface for your existing door frames. It’s an ideal solution for frames that are chipped, painted over too many times, or simply stylistically outdated.
Materials and Tools You’ll Need:
- Laminate flooring planks
- Tape measure and pencil
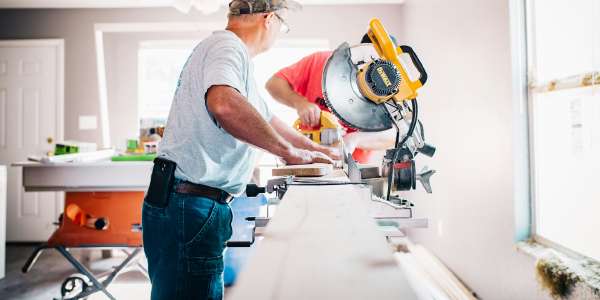
- A saw suitable for cutting laminate (e.g., a jigsaw or circular saw with a fine-tooth blade)
- Strong construction adhesive (a dimensionally stable PU adhesive is recommended)
- Caulking gun
- Optional: 5mm round filler material or color-matched sealant for corners
Step-by-Step Procedure:
- Measure and Plan: Carefully measure the width and height of the door reveals—the inner surfaces of the frame. Plan your cuts to ensure the laminate’s pattern flows logically.
- Cut the Laminate: Using your measurements, precisely cut the laminate planks to size. Take your time with these cuts, as accuracy is key to a professional look. It’s wise to cut one piece, test its fit, and then proceed with the rest.
- Apply Adhesive: Clean the existing door frame surfaces to ensure they are free of dust and grease. Apply a generous, even bead of the PU adhesive to the door reveals using a caulking gun.
- Install the Laminate: Firmly press the cut laminate pieces onto the adhesive-covered frame. Hold them in place for a moment to ensure a strong bond begins to form. Depending on the adhesive, you may need to use painter’s tape or clamps to hold the pieces securely while the adhesive cures.
- Finishing the Corners: The final touch that elevates this technique is a clean corner finish. You can fill the corner joints where the laminate pieces meet with a 5mm round filler material or a bead of color-matched acrylic or silicone sealant for a polished, seamless look.
This method not only saves you the demolition and expense of replacing entire frames but also offers an incredible range of design possibilities, from realistic wood grains to modern stone or solid color finishes.