Healthy Feet from Heel to Toe: Your Guide to Removing Corns, Calluses, and Nail Fungus

Our feet carry us through life, yet they are often the last part of our body to receive consistent care. Common issues like nail fungus, painful corns, and rough calluses can be uncomfortable and persistent. The good news is that with the right knowledge and a consistent routine, you can effectively manage these problems at home.
This comprehensive guide synthesizes proven home remedies and intensive treatments to help you achieve healthy, comfortable, and beautiful feet. The two most important ingredients for success are patience and consistency. Let’s get started.
Tackling Stubborn Nail and Foot Fungus
Nail fungus, medically known as onychomycosis, is a common and notoriously persistent infection that can cause nails to become discolored, thick, and brittle. It can be challenging to eliminate, especially if it has penetrated the nail bed.
Important Medical Disclaimer: Before beginning any treatment for a suspected fungal infection, it is crucial to consult with a doctor or podiatrist for a proper diagnosis. The information provided here is for informational purposes and is not a substitute for professional medical advice.
Home Remedies for Mild Fungal Infections
For early-stage or mild infections, some simple, consistent home treatments can be effective.
The Baking Soda Foot Bath Method
Alkaline foot baths using baking soda can create an environment hostile to fungal growth. This method is soothing and has the added benefit of softening calluses.
Instructions:
- Fill a basin with warm water, comfortable enough for a long soak.
- Add a full packet (approximately 50g) of baking soda and stir to dissolve.
- Soak your feet for at least one hour every night. Consistency is key; occasional soaks will not be effective.
- After the bath, dry your feet thoroughly, especially between the toes. Do not apply lotion immediately after, as excess moisture can hinder progress.
With daily application over several months, you may notice the infection beginning to grow out.
A Simple Topical Antifungal Mixture
This easy-to-prepare topical solution uses common household ingredients to fight fungus directly on the nail.
You Will Need:
- 1 tablespoon of oil (rapeseed or olive oil work well)
- 1 tablespoon of vinegar essence
- 1 tablespoon of liquid dish soap
- A small, sealable container and a cotton swab
Instructions:
- Combine all three ingredients in the sealable container.
- Shake vigorously until the mixture is uniform.
- Each morning after showering, dip a cotton swab into the solution and apply a small amount directly to the entire surface of the affected nail.
- For a potential boost, you can add a single drop of tea tree oil to the mixture, provided your skin tolerates it.
Treating nail fungus is a slow process. Healthy nail regrowth may become visible after approximately six months of diligent, daily application.
An Intensive Approach for Persistent Fungus
For stubborn or deeply embedded fungal infections, a more aggressive, over-the-counter approach may be necessary. This method requires uncompromising consistency to be successful.
The Regimen:
- Antifungal Nail Lacquer: Purchase a quality antifungal nail lacquer from a pharmacy. Instead of the typical weekly application, apply the lacquer to the affected nail every two days.
- Fungicide Spray: In addition to the lacquer, use a fungicide spray on the affected nail and surrounding skin every two to three hours throughout the day. The goal is to keep the area constantly exposed to the antifungal agent.
This rigorous schedule is demanding, but for severe cases, it can provide the constant pressure needed to eradicate the fungus and allow a healthy new nail to grow in.
Gently and Effectively Removing Corns
Corns are small, concentrated areas of hard skin that develop due to pressure and friction, often on the toes. They can be painful, but gentle home treatments can soften and remove them over time.
The Lanolin (Wool Grease) Plaster
Lanolin is a natural emollient that excels at softening hardened tissue. This method not only treats the corn but also provides a pressure cushion, offering immediate pain relief.
You Will Need:
- Lanolin (wool grease), available at most pharmacies
- Standard adhesive wound plasters
Instructions:
- Apply a generous amount of lanolin directly onto the wound pad of the plaster. Do not apply it to the surrounding skin, as this will prevent the plaster from sticking.
- Carefully place the plaster so the lanolin-coated pad is centered over the corn.
- Replace the plaster twice a day, once in the morning and once at night.
- Continue this process daily. The corn should soften and disappear within 2-3 weeks. For best results, start this treatment as soon as you notice a corn forming.
The Apple Cider Vinegar Compress
Apple cider vinegar’s acidic properties can help break down the hard skin of a corn. This homemade compress allows for a continuous, targeted application.
You Will Need:
- Round cosmetic pads
- Adhesive plaster strips or medical tape
- Apple cider vinegar
Instructions:
- Prepare the compress by placing a cosmetic pad on your work surface. Use adhesive strips to create a “bandage” that holds the pad and will stick to your skin.
- Apply one or two drops of apple cider vinegar directly onto the center of the cosmetic pad.
- Place the damp pad directly over the corn and secure it firmly with the adhesive strips.
- Cover with a sock and wear your shoes as usual. Keep the compress on all day.
- Remove it in the evening, clean the area, and repeat the process daily until the corn is gone.
Managing and Preventing Calluses
Calluses are larger, more diffuse areas of thickened skin that typically form on the heels and balls of the feet. While they are a natural protective measure, they can become uncomfortably thick and dry.
The In-Shower Pumice Stone Technique
The most effective time to treat calluses is when your skin is at its softest. By integrating a pumice stone into your shower routine, you can remove callused skin with minimal effort.
Instructions:
- Take your pumice stone into the shower with you.
- Go through your normal washing routine with soap and shampoo. The warm water and cleansers will significantly soften the skin on your feet.
- Toward the end of your shower, use the pumice stone to gently scrub your heels, the balls of your feet, and any other callused areas.
- You’ll find that the softened skin comes away easily, leaving your feet much smoother than if you had waited until after your shower.
- Rinse your feet and the pumice stone thoroughly before exiting the shower.
Post-Care and Prevention
Regular maintenance is the key to keeping calluses at bay.
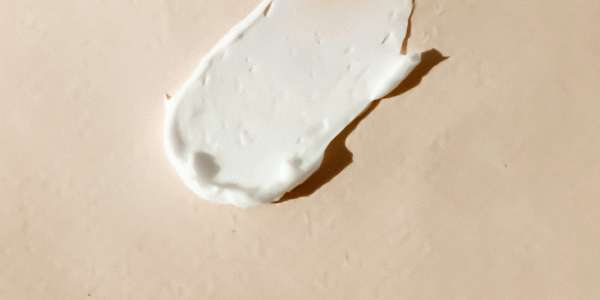
- Moisturize Daily: After showering and drying your feet completely, apply a rich foot cream or moisturizer. This rehydrates the skin and keeps it supple.
- Avoid Moisture Between Toes: When applying cream, be careful to avoid the area between your toes. Trapped moisture there can create an ideal environment for fungal growth.
- Use the Pumice Stone Regularly: By using the in-shower technique every few days, you can prevent significant callus buildup from occurring.
Your Path to Healthier Feet
Achieving and maintaining healthy feet is a marathon, not a sprint. Whether you’re battling a persistent nail fungus, a painful corn, or rough calluses, the solution lies in a consistent and patient approach. By incorporating these targeted treatments and preventative care habits into your routine, you can put your best foot forward every day.