How to Clean White Shoes: 4 DIY Hacks to Make Them Look New
A pair of crisp, clean shoes can elevate any outfit, but keeping them in pristine condition—especially white ones—feels like a constant battle against dirt, grime, and inevitable scuff marks. Before you consider retiring your favorite sneakers or spending money on expensive specialty cleaners, look no further than your own cupboards.
This comprehensive guide will show you how to restore your footwear using simple, effective, and affordable household items. We’ve synthesized the best DIY methods for tackling everything from general dinginess to stubborn black marks, turning your worn-out shoes back into box-fresh favorites.
Essential Prep: Before You Start Cleaning
Proper preparation is the key to achieving the best results and protecting your shoes from damage. Taking these preliminary steps will make the cleaning process smoother and more effective.
1. Remove Laces and Insoles
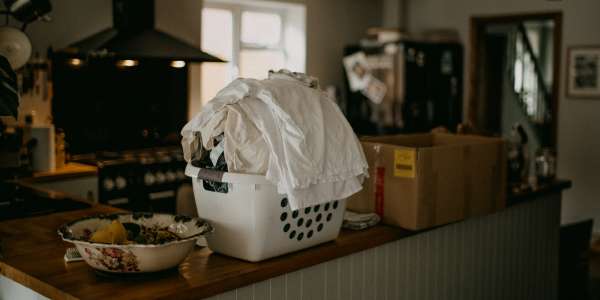
If possible, always remove the shoelaces and any removable insoles. This allows you to access all the nooks and crannies of the shoe, including the tongue and eyelets. You can wash the laces separately by hand in a small bowl of soapy water or place them in a mesh laundry bag and toss them in with your next load of laundry.
2. Brush Away Loose Dirt
Before applying any liquid cleaner, use a soft-bristled shoe brush or an old toothbrush to gently brush off any loose dirt, dust, and debris from the surface and soles of the shoes. This prevents you from rubbing abrasive dirt into the shoe’s fabric, which can cause damage or create mud.
3. The Crucial Spot Test
Whenever you try a new cleaning method or product, it’s vital to perform a spot test first. Apply a tiny amount of the cleaning solution to a small, inconspicuous area of the shoe, such as the inner heel or under the tongue. Let it sit for a few minutes, then wipe it away. Check for any discoloration, fading, or damage to the material. If the area looks fine, you can proceed with cleaning the rest of the shoe.
Everyday Cleaning Solutions for All-Over Grime
For general dirt and yellowing that dulls the look of your shoes, these all-purpose methods work wonders on a variety of materials, particularly canvas, mesh, and synthetic fabrics.
The Laundry Detergent Method for a Deep Clean
Your everyday laundry detergent is a powerful degreaser and cleaning agent that can easily lift dirt from fabric and synthetic shoe materials. This method is perfect for canvas sneakers that need a thorough refresh.
What You’ll Need:
- A small bowl
- Warm water
- Liquid laundry detergent (a gentle, dye-free version is best)
- A soft brush or cloth
- A clean, damp cloth for rinsing
Instructions:
- Create the Cleaning Solution: In the small bowl, mix a teaspoon of liquid laundry detergent with a cup of warm water. Stir until the detergent is fully dissolved.
- Apply and Scrub: Dip your soft brush or cloth into the soapy solution. Working in small sections, gently scrub the entire surface of the shoe in circular motions. Pay extra attention to heavily soiled areas. The suds will begin to lift the dirt from the material.
- Wipe and Rinse: Once you’ve scrubbed the entire shoe, take a separate clean cloth dampened with plain water and thoroughly wipe away all the soap residue. It’s important to remove all the detergent to prevent a sticky film from being left behind, which can attract more dirt.
- Air Dry: Stuff the shoes with clean paper towels or shoe trees to help them hold their shape and absorb internal moisture. Let them air dry completely in a well-ventilated area, away from direct sunlight or heat sources, which can cause yellowing or material damage.
Using Scouring Milk for Heavy-Duty Whitening
For tougher, set-in dirt on non-delicate surfaces like rubber soles or synthetic leather, a gentle abrasive cleaner can make a world of difference. Scouring milk (such as Cif or Viss) contains fine particles that help scrub away grime without being overly harsh.
What You’ll Need:
- A gentle scouring milk product
- A damp cloth or sponge
Instructions:
- Apply Sparingly: Dampen your cloth or sponge and apply a small dab of the scouring milk directly to it.
- Gently Scrub: Rub the soiled areas of the shoe with the cloth, applying light to moderate pressure. You’ll see the cleaner lift the dirt away. This technique is especially effective on the rubber midsoles and toe caps of sneakers.
- Wipe Clean: Use a clean, water-dampened part of the cloth to wipe away all the cleaner and residue. Ensure the surface is completely clean before letting it dry.
Caution: Avoid using abrasive cleaners on delicate materials like soft leather, suede, or colored fabrics, as they can scratch the surface or cause color to fade.
Tackling Tough Stains and Specific Areas
Sometimes, you need a more targeted approach for stubborn marks or specific parts of the shoe. These next-level hacks are perfect for detail work.
Brightening White Soles and Edges with Toothpaste
The white rubber edges of your soles are magnets for dirt and scuffs. The secret to restoring their brilliant white finish is likely already in your bathroom: toothpaste. The mild abrasives in non-gel white toothpaste work perfectly to scrub away stains.
What You’ll Need:
- White, non-gel toothpaste
- An old toothbrush
- A damp cloth
Instructions:
- Apply Toothpaste: Squeeze a small amount of white toothpaste directly onto the dirty rubber edges or soles of your shoes.
- Scrub Vigorously: Use the old toothbrush to scrub the toothpaste into the soiled areas. Use firm, circular motions to work the paste into the texture of the rubber, lifting the embedded dirt.
- Let It Sit: For tougher stains, you can let the toothpaste sit on the surface for 10-15 minutes to help break down the grime.
- Wipe Off: Use a damp cloth to wipe away all the toothpaste and the dirt it has lifted. Repeat if necessary until the edges are sparkling white.
Erasing Stubborn Scuff Marks with Nail Polish Remover
Black scuff marks on soles or patent leather can be incredibly frustrating and hard to remove with soap and water alone. An acetone-free nail polish remover can dissolve these marks without damaging the shoe’s surface.
What You’ll Need:
- Acetone-free nail polish remover
- Cotton balls or a cotton swab
- A clean cloth
Instructions:
- Spot Test First: This is non-negotiable. Nail polish remover can be harsh. Test a tiny, hidden spot first to ensure it doesn’t strip color or damage the shoe’s finish.
- Apply with Precision: Lightly dampen a cotton ball or swab with the acetone-free nail polish remover.
- Dab, Don’t Rub: Gently dab or blot the scuff mark. The remover will begin to dissolve the mark. Avoid aggressive rubbing, which can spread the stain or harm the material.
- Wipe and Clean: Once the scuff is gone, immediately wipe the area with a clean, damp cloth to remove any residual nail polish remover.
- Air Dry: Let the area dry completely. This method is most effective on rubber soles and is generally safe for patent leather, but exercise extreme caution on colored or matte-finish materials.