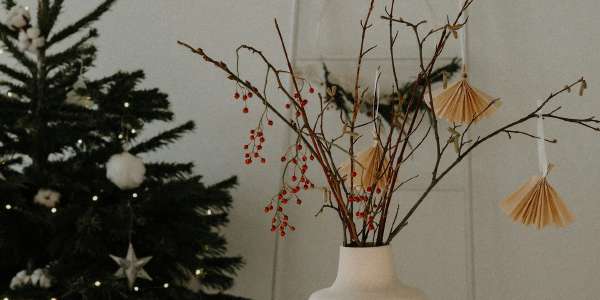
How to Make a Beautiful Autumn Wreath: A Complete DIY Guide
Autumn is a season of spectacular transformation, painting the landscape in a rich palette of gold, crimson, and bronze. This natural bounty provides the perfect opportunity to bring the outdoors in by creating beautiful, sustainable decorations for your home. An autumn wreath is a classic project that captures the essence of the season, and with a little creativity, you can craft a stunning piece using materials foraged from your own backyard or local park.
This comprehensive guide will walk you through two distinct methods for creating a DIY autumn wreath: a classic layered leaf technique and a more rustic tied-bunch method. Whether you prefer a uniform, elegant design or a wild, textured look, you’ll find all the steps you need to craft a beautiful welcome for your door or a festive centerpiece for your table.
Gathering Your Natural Materials
The first, and perhaps most enjoyable, step is to go on a nature walk to gather your supplies. Autumn offers an abundance of treasures, especially as many hedges and perennials are due for a trim. Look for a variety of textures, colors, and shapes to create a visually interesting wreath.
What to Forage For:
- Leaves: Look for leaves that are colorful and still somewhat pliable. Maple leaves offer vibrant reds and yellows. Oak leaves, particularly from the Pin Oak (Quercus palustris), are an excellent choice. Their reddish-brown hue and firm, smooth texture help them maintain their shape well, even after drying.
- Berries and Seed Pods: Clusters of berries add pops of color and texture. Good options include rosehips, privet berries, rowan, and hawthorn. Interesting seed heads, like those from clematis, add a whimsical, delicate touch.
- Flowers and Foliage: The last of the season’s blooms can provide wonderful accents. Consider using spent hydrangea blooms, which dry beautifully, or flowers like tansy and stonecrop. Sprigs of evergreen foliage like arborvitae or fresh sage shoots can add fragrance and a sturdy base to your bundles.
- Other Textures: Don’t forget items like maple samaras (the “helicopter” seeds) or small pinecones, which can fill gaps and add rustic charm.
Essential Tools and Your Wreath Base
Before you begin assembling your wreath, gather your tools. The base you choose will provide the foundation for your design. A straw wreath form, available at most craft stores, is sturdy, easy to work with, and made from natural materials.
Materials Checklist:
- A wreath base (a 25-30 cm straw base is a great starting point).
- Your foraged natural materials.
- For the Pinning Method: A box of thumbtacks or floral pins.
- For the Tying Method: A spool of thin, flexible craft wire or floral wire.
- Scissors or pruning shears.
- Optional: A decorative ribbon or cord for hanging.
Method 1: The Layered Leaf Wreath (Pinning Technique)
This method is perfect for creating a lush, dense wreath using a single type of leaf, such as the recommended Pin Oak leaves. The technique involves layering small bundles of leaves to create a seamless, tile-like effect.
Step-by-Step Instructions:
- Create Leaf Bundles: Start by gathering two to three leaves. Arrange them so they fan out slightly, creating a small, attractive cluster.
- Attach the First Layer: Place your first leaf bundle flat against the front of the straw wreath base. Use a thumbtack or pin to firmly secure the stems of the leaves to the base.
- Overlap and Layer: Take your next leaf bundle and place it so it slightly overlaps the first one, similar to how tiles are laid on a roof. This will hide the pin from the previous bundle. Secure this second bundle with another pin.
- Continue Around the Wreath: Continue this process, working your way around the entire wreath. Keep the leaves pointing in the same direction and maintain a consistent overlap for a polished look.
- Tuck in the Final Layer: When you have circled the entire wreath, gently lift the leaves of your very first bundle and tuck the stems of your final bundle underneath them. Secure it with a pin, creating a seamless and continuous ring of leaves.
- Refine the Shape: Turn the wreath over and secure any loose leaves on the underside. Look at the wreath from the front and sides. If there are any sparse areas, create smaller leaf bundles and pin them into the sides to achieve a full, rounded shape.
Method 2: The Mixed Foraged Wreath (Tying Technique)
If you’ve collected a wide variety of materials, this tying method is ideal. It allows you to combine different textures and shapes into small bunches, creating a rustic and beautifully wild wreath. The key to this method is to wrap the materials tightly so they support each other as they dry and wilt.
Step-by-Step Instructions:
- Prepare Your Wire: Cut a long piece of craft wire, but keep it attached to the spool if possible. Wrap one end of the wire around the wreath base several times to anchor it, leaving a 5-10 cm tail.
- Create Small Bundles: Group a small selection of your foraged materials—a sprig of greenery, a cluster of berries, a few leaves—into a mini-bouquet.
- Attach the First Bundle: Lay the first bundle onto the wreath base. Holding it firmly in place, wrap the craft wire tightly around the stems several times to secure it. Do not cut the wire.
- Layer the Next Bundle: Create another small bundle and place it on the wreath so that it overlaps the stems of the first one, concealing the wire. Wrap the wire tightly around the stems of this new bundle.
- Continue and Conceal: Repeat this process, consistently overlapping the new bundles on top of the previous ones. This layering is crucial for hiding the mechanics and creating a lush, cohesive design. Work your way around the entire form until it is completely covered.
- Secure and Finish: Once you’ve added your last bundle, tuck it underneath the foliage of the first bundle. Wrap the wire around the stems a final few times. Cut the wire from the spool, leaving a 10 cm tail. Twist this tail together with the starting tail on the back of the wreath to secure it, then trim any excess.
Display and Care for Your Autumn Wreath
Your finished wreath can be hung on a door using a beautiful ribbon or a simple cord. Alternatively, it can be used as a stunning table centerpiece. For a touch of ambiance, place a large LED pillar candle in the center (never use a real flame with dried natural materials).
Your wreath will naturally dry out over the coming weeks, and its appearance will change subtly. To prolong its life, you can lightly mist it with water every few days. Once the season is over, you have a few sustainable options. The natural materials can be removed and added to your compost bin. For a second act, you can spray the entire dried wreath with metallic gold or silver lacquer for a surprisingly elegant Christmas decoration.