How to Remove Sticky Adhesive Residue: 4 Proven Methods
Whether it’s the lingering goo from a price tag, the stubborn remnants of old tape, or the tacky mess from a fly trap, sticky adhesive residue is a universal frustration. It’s unsightly, attracts dust and grime, and can seem impossible to remove without damaging the surface underneath.
Fortunately, you don’t have to resort to endless scrubbing or harsh chemicals that could ruin your belongings. With the right techniques and a little patience, you can conquer any sticky situation. This comprehensive guide will walk you through four proven methods, from potent commercial cleaners to simple items you already have in your kitchen, ensuring you have the perfect solution for any type of adhesive on any surface.
Before You Begin: Preparation is Key
Before tackling that stubborn residue, a few simple preparation steps will ensure a safe and successful cleaning process.
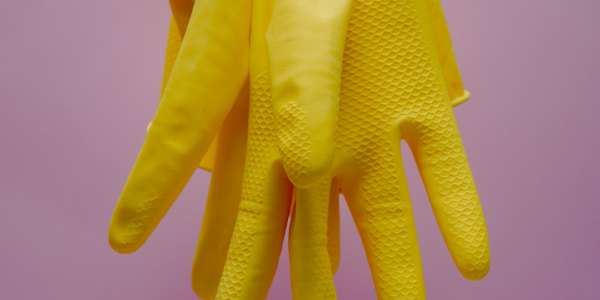
- Scrape Away the Excess: If there’s any remaining paper from a label or the bulk of a sticker, gently peel or scrape it off. A plastic scraper, an old credit card, or even your fingernail can work well. The less material the cleaning agent has to penetrate, the faster it will work.
- Gather Your Tools: Having your supplies ready makes the job much easier. You’ll likely need:
- Soft, clean cloths (microfiber is excellent)
- Paper towels
- A plastic scraper or spatula
- Your chosen cleaning agent
- Always Spot Test: This is the most crucial step. Before applying any cleaner to a large, visible area, test it on a small, inconspicuous spot first. This will confirm that the method won’t discolor, warp, or otherwise damage the surface material.
Method 1: The Commercial Cleaner Approach
For tough, aged, or widespread adhesive residue, sometimes a specialized product is the most efficient solution. This is particularly true for stubborn adhesive from old fly screens on window frames or other challenging messes.
When to Use a Specialized Cleaner
Opt for a commercial adhesive remover when you’re dealing with very strong glues or when household methods have failed. These products are formulated specifically to dissolve the chemical bonds in adhesives, making them incredibly effective.
How to Use an Adhesive Remover
Most commercial adhesive removers, especially citrus-based ones, are user-friendly and powerful.
- Ventilate the Area: Work in a well-ventilated space, as some products can have strong fumes.
- Apply the Cleaner: Spray the product directly onto the adhesive residue, ensuring it’s fully covered.
- Let It Dwell: This is a critical step. Allow the cleaner to sit for 5-10 minutes (or as directed by the product instructions). This gives the active ingredients time to break down the adhesive.
- Wipe and Scrape: Use a clean cloth to wipe away the softened residue. For thicker patches, a plastic scraper can help lift the goo. The adhesive should come off with minimal effort.
- Clean the Surface: After the residue is gone, clean the area with a standard all-purpose cleaner or soap and water to remove any remaining solvent.
These cleaners are often safe for various surfaces, including glass and plastic window frames, and many leave behind a pleasant scent, like orange or lemon.
Method 2: The Oil-Based Solution
One of the most effective and gentle methods for removing sticky residue involves a common kitchen staple: cooking oil. This technique is surprisingly powerful and works on a wide variety of adhesives, especially the gooey kind found on fly traps and product labels.
The Science Behind It
Many adhesives are oil-based (non-polar). Applying another oil (like olive oil or mineral oil) acts as a solvent, effectively dissolving the adhesive and breaking its bond with the surface.
Step-by-Step Instructions
- Choose Your Oil: Any plant-based oil will work, such as olive oil, canola oil, or sunflower oil. Baby oil or mineral oil are also excellent choices.
- Apply the Oil: For a horizontal surface like a windowsill, pour a small amount of oil directly onto the sticky spot. For a vertical surface, saturate a paper towel or cotton ball with oil and press it against the residue.
- Let It Soak: Give the oil at least 15-20 minutes to penetrate and dissolve the adhesive. For very stubborn spots, you may need to let it sit longer.
- Rub and Remove: Using a soft cloth, rub the area in gentle, circular motions. You will feel the adhesive start to loosen and ball up. Continue rubbing until all the residue is gone.
- Clean Up: Once the sticky mess is removed, you’ll be left with an oily patch. Simply clean the surface with warm, soapy water or a suitable all-purpose cleaner to remove the oily film.
Special Consideration for Wood: This method is fantastic for finished wood. If you’re cleaning natural or oiled wood, after removing the adhesive and cleaning the spot, it’s a good practice to re-apply a conditioning oil (like walnut or tung oil) to the entire surface to restore its finish and ensure an even appearance.
Method 3: Acidic Household Staples
The gentle power of acid found in common kitchen items can be a game-changer for dissolving sticky residue. Lemon juice is particularly effective and offers a fresh-smelling, chemical-free cleaning alternative.
Why Acids Work
The mild acid in lemon juice (citric acid) works to break down and weaken the structure of many adhesives, making them easy to wipe away. This method is most efficient when the adhesive or label is still largely intact, as it allows the juice to saturate the material from above.
Step-by-Step Instructions
- Apply Lemon Juice: Generously apply lemon juice—either freshly squeezed or from a bottle—directly onto the adhesive residue. Ensure the entire area is completely saturated.
- Allow It to Penetrate: Let the lemon juice sit for 5-10 minutes. You may see the edges of the label start to lift or the residue begin to look softer.
- Wipe or Peel: After waiting, the softened adhesive should be easy to remove. Often, you can peel the entire sticker off in one piece. If only residue remains, wipe it away with a clean cloth.
- Rinse: Wipe the area with a damp cloth to remove any sugary lemon residue.
Method 4: The Unconventional Kitchen Hack
Sometimes the most effective solutions come from the most unexpected places. For stubborn residue left by fly screens or even old silicone caulk, one surprisingly potent tool is dishwasher rinse aid.
A Surprising Solution
Rinse aid is designed to break down mineral deposits and reduce the surface tension of water, but its powerful surfactants can also work wonders on certain types of stubborn adhesives.
Step-by-Step Instructions
- Apply the Rinse Aid: Generously spray or pour the rinse aid directly onto the affected areas.
- Let It Work: Allow it to sit for a few minutes to begin its work dissolving the adhesive bond.
- Scrape Carefully: Using a narrow plastic spatula or scraper, carefully begin to lift the loosened adhesive. It should come away much more easily than before.
- Final Clean: Once the residue is gone, wipe the entire area with a damp cloth and an all-purpose cleaner to remove any leftover rinse aid.
Conclusion: Say Goodbye to Sticky Messes
Dealing with adhesive residue doesn’t have to be a chore. By understanding the nature of the mess and the surface you’re working with, you can choose the perfect removal method.
For best results, always start with the gentlest approach first—like the oil or lemon juice methods—before moving on to more powerful commercial cleaners. With these four proven techniques in your cleaning arsenal, you’ll be equipped to handle any sticky situation with confidence, restoring your surfaces to their clean, pristine state.