The Ultimate Guide to Removing Stubborn Grease from Kitchen Surfaces
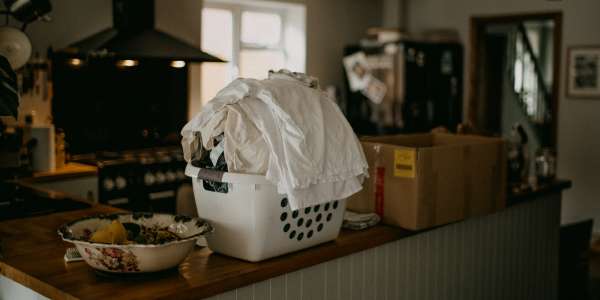
Over time, every well-used kitchen develops a familiar, unwelcome guest: a stubborn, sticky film of grease. It settles on cabinets, coats countertops, and clings to surfaces, attracting dust and grime until everything feels tacky to the touch. This buildup isn’t just unsightly; it can be surprisingly difficult to remove. While the market is flooded with chemical-laden degreasers, the most effective solutions are often hiding in your pantry.
This comprehensive guide will show you how to defeat stubborn kitchen grease using two powerful, low-cost methods for your cabinets and plastic countertops. We’ll break down the science, provide step-by-step instructions, and share proactive tips to keep your kitchen looking pristine for longer.
Understanding Kitchen Grease
Before diving into the cleaning methods, it’s helpful to understand what you’re up against. Cooking oils, fats, and microscopic food particles become airborne during cooking, especially when frying or sautéing. This aerosolized grease then settles on nearby surfaces. Because oil and water don’t mix, simply wiping with a damp cloth does little to break down the hardened, sticky layers. Effective cleaning requires a substance that can either dissolve the oil or chemically break it down.
How to Deep Clean Greasy Kitchen Cabinets
Kitchen cabinets, especially those above the stove, are prime targets for heavy grease accumulation. This method uses the scientific principle of “like dissolves like” to cut through the toughest grime without damaging your cabinet finish.
The Oil-Cleansing Method for Cabinets
It may sound counterintuitive, but one of the best ways to remove old, hardened cooking oil is with fresh, clean oil. The clean oil acts as a solvent, loosening and lifting the sticky, polymerized grease from the cabinet surface, making it easy to wipe away.
What You’ll Need:
- Inexpensive cooking oil (vegetable or mineral oil works well)
- A non-scratch scouring pad or sponge
- A bowl of warm water with a squirt of dish soap
- A clean, absorbent cloth or sponge for rinsing
- A dry, lint-free cloth for buffing
Step-by-Step Cleaning Guide
- Prioritize Safety: If you’re cleaning upper cabinets, use a sturdy step stool or ladder to ensure stable footing. Clear the countertop below to create a safe workspace and prevent accidental spills on your appliances.
- Apply the Oil: Saturate the abrasive side of your scouring pad with a small amount of cooking oil. You don’t need to drench it; just enough to make it damp.
- Scrub the Grease: Working in small, manageable sections, gently scrub the greasy areas of the cabinet. Use circular motions and apply consistent pressure. You’ll feel the sticky resistance give way as the old grime dissolves. For extremely heavy buildup, let the oil sit for a minute or two before scrubbing.
- Wipe with Soapy Water: Once the grease has been lifted, dip a clean sponge into your bowl of warm, soapy water. Wring it out well and wipe down the section you just cleaned. The dish soap will cut through the cleaning oil and the loosened grime, removing all residue.
- Rinse and Dry: Wipe the cabinet with a fresh cloth dampened with plain water to remove any soap residue. Finally, dry the surface completely with a lint-free cloth to prevent water spots and restore its natural sheen.
Tackling Stubborn Grime on Plastic Countertops
Plastic laminate countertops are durable, but they can develop a dull, sticky film that resists conventional cleaners. Darker countertops are particularly notorious for showing every fingerprint and greasy smear. For this challenge, we turn to a powerful alkaline cleaner: washing soda.
The Power of Washing Soda
Washing soda, or sodium carbonate, is a highly effective, natural degreaser. Its alkaline nature allows it to break down and saponify fats and oils, turning them into a soap-like substance that can be easily washed away.
What You’ll Need:
- 1 tablespoon of washing soda
- 1 liter of lukewarm water
- A small squirt of dish soap
- A plastic kitchen sponge
- Clean cloths for rinsing and drying
- Protective gloves (washing soda can irritate the skin)
Step-by-Step Cleaning Guide
- Prepare the Solution: In a bowl or bucket, combine one liter of lukewarm water with one tablespoon of washing soda and a small squirt of dish soap. Stir the mixture until the washing soda is completely dissolved. Always wear gloves when working with this solution.
- Scrub the Countertop: Dip the rough side of your kitchen sponge into the washing soda solution. Scrub the entire countertop surface thoroughly. As you work, you’ll notice the gritty, resistant feeling of the soiled surface transform into a smooth, clean texture.
- Rinse Thoroughly: After scrubbing, it’s crucial to remove all cleaning residue. Wipe the countertop multiple times with a clean cloth dipped in plain water. Rinse the cloth frequently to ensure you’re lifting the residue, not just spreading it around.
- Dry and Polish: Dry the surface completely with a clean, lint-free cloth. For an extra touch of brilliance, you can enhance the shine. Apply a tiny amount of cooking oil—just a few drops—to a clean cloth and gently buff it into the countertop. This optional step helps restore the original, silky-matte appearance and can keep the surface looking clean for weeks.
Proactive Measures: Preventing Future Grease Buildup
Once your surfaces are sparkling clean, the best strategy is prevention. A few simple habits can dramatically reduce the rate of grease accumulation.
- Use Your Exhaust Fan: Always turn on your range hood or exhaust fan when cooking, especially when frying. This captures airborne grease particles before they have a chance to settle on your cabinets and counters.
- Wipe Down Surfaces Regularly: After cooking, give the backsplash and nearby countertops a quick wipe with a damp, soapy cloth. This prevents grease from building up and hardening over time.
- Protect Your Upper Cabinets: The tops of upper cabinets are unseen grease magnets. To make cleaning a breeze, cut a liner to fit the top surfaces. A non-woven renovating fleece, often found in hardware stores, is an excellent choice. It’s durable, wide, and inexpensive. Alternatively, you can use old newspapers or wax paper. Simply lay the material down and, once a year, roll it up and replace it. Use a piece of double-sided tape or a heavy, unused item to keep the liner from shifting.